My bunny has big ears, and she is such a good listener!
I made this sculpture with items I found at the shore. There are broken dishes in green, blue and white; broken glass in green and brown; there are also shells, rocks, wood, seed pods and a feather. Of course, I could not stop at hot glue, grout and acrylic paint! I just had to add lasers!!!!!
The substrate is a wooden fruit crate, which has cute round holes that were perfect for a light sensor and a speaker. I essentially made a laser communicator hidden in a bunny sculpture, which I used to wirelessly transmit music 100 feet away! I had to do it at night, because I kept losing track of the laser. In the end I taped the laser transmitter to the roof of my car and moved the receiver bunny into the laser stream on my neighbor's porch. Check out the video link below the pictures to see how I did it.
Did you know that NASA can stream video to the moon and back using lasers and satellites?
You can make a similar "Data Communicator" with infrared (IR) led's.
Do you wanna build a snow globe? In summer? Us, too! We spent a few days making the polymer clay Olaf and finding a fishbowl and sheet music. The electronics assembly was super fast.
Here is Jack helping me with the finishing touches:
Today I'm taking apart Jack's broken MP3 Player so that I can harvest the SD card reader. I am trying to make an SD card reader bit for my DIY littleBits collection. Unfortunately, I fixed it, so now I'm not sure where to go next...
This is a video of me doing a teardown of my Ice Cream Jukebox, which was a project originally posted by Dave over at littleBits. I don't have access to a laser cutter, so I used these items from my recycling bin: ice cream box, a VHS tape for the "card reader", cereal box, tape, and a speaker from broken headphones that my mom had asked me to fix. For the different transparencies, I used a milk jug, foil lined tea bag envelope, a cut up and taped down VHS tape, and maybe I'll use a juice pouch for another transparency.
Since I used an ice cream box as the container, I thought it would be fun to use ice cream themed songs. The songs are "It's A Small World", "The Entertainer", "Mr. Softee", and "You Are My Sunshine". The code uses the pitches.h arduino library.
This is a prototype in progress. I have managed to get the circuit working correctly, but making a motor actually pump soap is challenging my skills.
This circuit is based on expired circuit US4989755 A, which was invented by Shiau Guey Chuan. It has been modified by JackANDJude for prototyping with littleBits. First, with the roller switch already depressed, the user places a hand in front of the sensor. The light trigger senses a change in light and turns on the motor. The motor turns the gears and cam, releasing the roller switch and moving the plunger up and down. Finally, if the user has moved away from the sensor, the cam re-presses the roller switch, thus turning off the motor and "resetting" the bistable flip flop circuit.
The littleBits shown in this video include "double AND" and "inverter", which are my substitutes for NAND. Unfortunately, the legos cannot push my soap dispenser even when I adjust the gears for more torque or use a dollar store dispenser with water in it. The legos strain and break apart. I need to come up with a design beyond the circuit. Any ideas on solving this pumping problem would be appreciated. :)
For reference, here is an image of the originally patented circuit:
After the "blink" sketch, this was my first arduino project. I used the littleBits Arduino module to make 6 led's blink in sequence, which I think is a great way to animate a museum display or diorama.
I have been thinking a lot about how animals, dinosaurs, people, and bugs move. In particular, I wanted to find out how a grasshopper jumps, so I found a great slow motion video that shows just that. I included a clip of it here in my project video:
Use motors and led's to make autonomous art bots that paint with light.
A camera that has a slow shutter speed or an app that can imitate slow
shutter speeds plus a steady way to mount your camera is required (I actually set my ipad on the table).
You too can wack a foil ball or a dark balloon with a servo and a light sensor.
Assemble the littleBits circuit: power + wire + wire + light sensor + servo.
Attach the circuit to a lightweight stick like a
chop stick or a bubble wand. The light sensor should be affixed to the
end of the bubble wand so that it is facing the light. The servo should
be oriented so that when the stick moves, the front of the light sensor
is hitting the ball.
Tape wires to the stick, leaving slack at the base to allow for movement.
Set servo to turn mode and light sensor for dark
mode. Adjust sensitivity so that with one light source your sensor can
detect the shadow cast by either a dark balloon or a foil ball.
Hold the black rectangular portion of the servo
with one hand and dangle a foil ball tied to a 2 foot string with the
other hand. The servo should show some movement.
Hot glue a 9 volt battery
clip or maybe an extra large binder clip to a block of wood so that the
servo and stick have free range of movement when the servo is clipped
into place.
Don't worry, it's not actually radiation! This is how we made an X-Ray machine with littleBits!
This is the basic littleBits circuit:
power + roller switch + branch + timeout + buzzer + inverter + bargraph + led
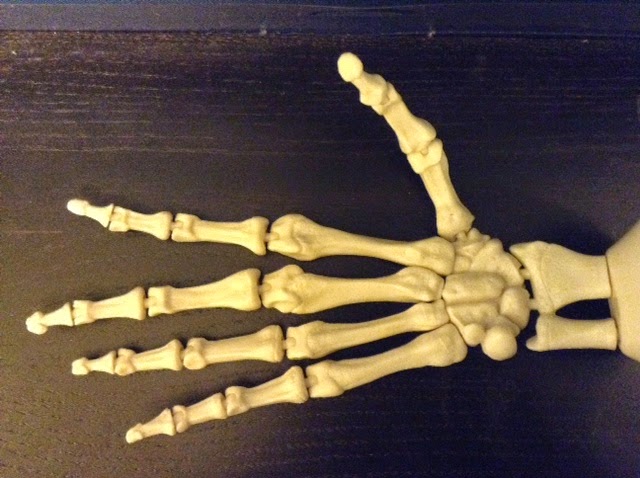
When you press the roller switch, the timeout starts to sound the buzzer (making X-Ray machine sounds). Quickly turn off the lights! Next the timeout turns off the buzzer, the inverter turns on the bargraph and led behind the two images. The skeleton hand mysteriously shines through Greg's hand. Pretty, neat, eh?
So that you can try it too, I've included the pictures of Greg's hand and the skeleton hand.
I make the kids dance for bubbles! With no solder, I used littleBits and a 5 volt relay to hack my battery powered bubble machine. littleBits
connect together magnetically, and I used a hacked wire bit and a breadboard for the relay.
The basic circuit is power + motion trigger + timeout + led + hacked wire bit + 5 volt relay + bubble machine
This is what my hacked wire bit looked like when I connected it to the relay. I soldered three wires to what littleBits calls a "branch" bit so that I can connect them to any breadboard. I taped off the red voltage wire (not to be used here) and plugged in the middle signal wire and bottom ground wire into the relay. Another option could have been to actually cut a "wire" bit and use those wires to insert into the breadboard. That would have made this hack completely solder free, which is important for those who don't like to handle a hot soldering iron. I actually burnt my hand in December before I had the right equipment; "helping hands" really do help!
For the other half of the relay I needed to access two wires that I disconnected from the bubble machine switch. First I drilled a hole close to the switch at the top of the bubble machine. There I cut the two switch wires. Further down I drilled another hole so I could pull the wires through. Of course I removed the bubble machine batteries while I was cutting and
pulling wires - only to put them back in when the circuit was
assembled. Then I connected those two wires to the relay with alligator clip wires and I wrapped the alligator clips with black electrical tape to prevent a short.
Finally I covered the littleBits with plastic wrap so bubbles won't get them wet. If the motion
trigger is a tad too sensitive, you can cover it with duct tape or craft
materials. The littleBits website has tips and tricks on how to
adjust the motion trigger sensitivity and direction.
I haven't put this project in a project box, but maybe I should? I entered this project into two instructables contests, and a clean presentation in a box could make the difference. Maybe I'll do that...
When an unsuspecting person turns the lights on or off this little guy will do a song and dance. We're using DIY littleBits, but you can use any switch or circuit that suits your needs, like littleBits modules. This works with any dancing bear type toy that starts and stops when you press a button.
My first littleBits projects were made with all DIY littleBits.
Police Lights:
You can make this simple flashing led circuit with the following littleBits modules: power + pulse + RGB led + inverter + long led with a marker cap on it.
Talking Emotional IQ Box:
To make an Emotional IQ Box (marshmallow test). You could also make a
fridge light and a box with an alarm to keep your stuff secure. This is Jack's favorite circuit so far. He loves that the box says "Uh Oh!" in my voice when he opens it. He asks me all the time to re-create this circuit.
The basic circuit is: power + button + timeout + roller switch + buzzer
You can make your own with littleBits modules!
Instead of a buzzer, I hacked a dollar store voice reminder to say whatever I want. I removed the voice reminder's built in switch, and disconnected the power wires from the battery box and hooked up then to the signal and ground wires of littleBits.
Clearly, I am just having fun putting marshmallows in my talking box.
If you wanted to use this for a real psychological test for school, you
would need to use a timer and follow a script. Click on this article about
how effective the "Marshmallow Test" is at predicting future success.
After my DIY littleBits Instructable won the "Supercharged Contest", littleBits donated more than enough modules for me to give a workshop for 20 Fresh Air Fund kids this summer! Truly they stand behind their mission to democratize electronics. We already had a spring event to celebrate "Fresh Air Fund Day"; here's how it went.
On Saturday, March 15, 2014, volunteers and neighbors came together to
celebrate “Fresh Air Fund Day.” The festivities included a circuit
building workshop led by FAF local chairperson and host parent, Judith Brisson (me),
and a science teacher from the Dalton School, Glenn Simonelli. Parents
and kids worked together to experiment and build with an assortment of
modules provided by littleBits. It was so much fun to kick off our
spring celebration with this littleBits workshop; hopefully more people
will volunteer with the Fresh Air Fund to host a NYC child for a week or two this summer!
Everyone had a lot of fun building circuits, even without prior experience. Visit theFresh Air Fund to learn more about how to help NYC kids enjoy summer. We'd like to
give a big shout out of thanks to littleBits for their generous donation
of modules; our visiting kids this summer will certainly ENJOY! A last
minute surprise was that RadioShack donated 9 volt batteries - thank
you! Finally, thanks to Instructables and to all who voted for DIY littleBits and to our volunteer science teacher for the day, Glenn Simonelli.
Mickey and Minnie's Mansion:
Father and daughter team Brett and Ta’lia created a castle themed
birdhouse which she called, “Mickey and Minnie’s Mansion.” At the
entrace of the mansion is a pipe-cleaner with a happy face bead that
pops out of the door to welcome visitors who press the doorbell. At the
top is their “entertainment,” which consists of a DC motor with a foam
ball and feathers illuminated by a UV LED. She colored the foam ball
with a yellow highlighter, so it glows bright in the UV light. Her
circuit included power + dimmer + wire + DC motor + UV LED. Click the video on the right to see her masterpiece in action. During the workshop,
Ta’lia also had time to construct a prank handshake and a motion
detector circuit that sounded off a buzzer and lit up some LED modules.
Home alarm system with a simulated smartphone interface:
Wesley equipped a birdhouse with a fire/intruder alarm. When the circuit
detects motion, the lights go on in the house and a buzzer sounds an
alarm to alert the authorities. His circuit was created by snapping
together power + motion trigger + buzzer + wire + bargraph + LED.
Wesley also made a graphical user interface with his smartphone to
simulate a touch-pad for the alarm system – so cool! See his creation in
the video on the left.
My primary motivation in learning about electronics is to teach Jack (and other kids while I'm at it) how the electronic world around us works. Towards that effort I quickly ran through many demonstrations with SnapCircuits and breadboarded 555 chip projects from Forrest Mims books. I needed permanent circuits that could interact with each other - more complicated designs to keep both of us engaged in learning circuit skills. I scoured the internet for reliable circuits, but there is a lot of noise out there. I first heard about littleBits from Ayah Bdeir's TED Talk. I was so happy when she finished her talk with an invitation to visit their website and work with their designs:
"So littleBits is open-source.You can go on the website, download all the design files, make them yourself.We want to encourage a worldof creators, of inventors, of contributors,because this world that we live in,this interactive world, is ours.So go ahead and start inventing."
So I did just that. I started making littleBits in December after Greg got me a helping hands for Christmas and I learned how to solder. When I saw that littleBits had sponsored a contest on Instructable, I thought for sure that their intention was not just to raise consumer awareness about their product and get people making things with littleBits, but to also get people in the Instructables community to start making their own. I don't know if that last part is true, but I turned out to be the only one thinking along those lines. DIY littleBits was immediately featured and I won a first prize package from littleBits. It was even a finalist in the 123D Circuits contest. I continue to get a hundreds of visits weekly to that instructable, the total will be 66K by the end of today.
Here's a brief overview of my DIY littleBits. Visit my Instructables page for complete instructions on how to make your own, and check out other blog posts to see projects I made with these components.
1. power
2. RGB led - light sensitive - That's my own twist on the original design.
3. long bright led
4. button - This is the easiest bit to make
5. inverter - I scavenged an old PC for these connector pins.
6. pulse
This pulse module looks like standard 555 stuff, but looks can be deceiving. Most littleBits have an op amp chip in them. I tried making them without the op amp chip, and the very dim leds resulted when I connected multiple modules. Once I put 741 op amp chips back into the design, the led's returned to their brightness.
7. lever (roller) switch
This lever switch is what electricians sometimes call a "3 way" switch. It's just like a staircase light with a switch at the top and bottom of the stairs. It can be a little hairy trying to understand what is happening; I made a lot of sketches and tests before soldering.
8. light trigger
This is an adjustable light and a dark trigger circuit in one, both feeding into an op amp chip with a Double Pole Double Throw (DPDT) switch. The user decides if a positive message will be sent when there is darkness or when there is light. I folded over the transistors and resistors that you see poking over the top; that is my transistor AND gate.
9. timeout
My timeout only has an on off state, because I can use an inverter when I want it to be an off on timeout. I ran out of steam when making this one, and I made a big mistake by using a resistor array attached to 10 dip switches. However, I think my design has charm, so I am keeping it the way it is.


